
Last Updated: November 5, 2026
Quick Summary
Simple historical recipes for home cooks work best when you start with a dish you already cook, such as skillet cornbread or beef and root vegetable stew, then translate old measurements and oven terms into modern equivalents. Pick recipes with five to eight ingredients, weigh your flour, and use modern canning safety instead of old wax seals.
- Skillet cornbread bakes in a 425°F oven for 20 to 25 minutes and serves 6 to 8.
- A gill equals 1/2 cup and butter the size of an egg is about 2 tablespoons.
- Map a moderate oven to 350°F to 375°F and a quick oven to 400°F to 450°F.
- Water-bath canning is only safe for high-acid foods like fruit preserves and pickles.
- Cornbread is the safest first pick, with beef and root vegetable stew as the best second.
Table of Contents
- Start With Simple Historical Recipes for Home Cooks
- How to Pick a Recipe That Won't Fight Back
- Old Recipes From the 1800s You Can Cook This Week
- Essential Tools for Historical Cooking
- Adapting Vintage Recipes for Modern Cooking
- Food Safety When Recreating Old Preservation Methods
- Pick Your First Historical Recipe and Cook It This Weekend
- Frequently Asked Questions
Start With Simple Historical Recipes for Home Cooks
Historical recipes are written instructions for preparing food the way cooks did in a past era, from colonial kitchens to wartime ration books.
Most guides hand you a 200-year-old recipe and skip the translation. Old recipes assume a wood stove or open fire and measure in "a teacup" or "butter the size of an egg." Cook them word for word and you get a mess; adapt them properly and you get food that still tastes good today.
Below, we'll show you how to pick a recipe, convert the measurements, and cook it this weekend with cheap pantry staples.
How to Pick a Recipe That Won't Fight Back
Start with a dish you already cook.
Avoid showpieces. Old recipes for fancy cakes and layered desserts need equipment and timing that trip up experienced cooks.
Use this quick filter before you commit:
- Pick recipes with short ingredient lists. Five to eight items means fewer surprises.
- Avoid recipes that rely on a single tricky step. A slow simmer is forgiving. A spun-sugar crown is not.
- Check that every ingredient is still sold today. If you can't find it at a normal grocery store, skip it for now.
The Smithsonian's food history collections are a solid place to read original recipes and see how they were written.
Once you've picked one, read it twice with a pen. Mark every vague amount and missing temperature, those are the spots where you'll make the modern call.
Old Recipes From the 1800s You Can Cook This Week
The 1800s gave us some of the most cookable dishes in the historical canon: cornbread, spoon bread, scones, stews, and fruit preserves all still work in a normal kitchen.
Pick one baked good and one pot dish: bake the bread, simmer the stew, and you've covered the two core skills of 1800s cooking.
Cornbread, Spoon Bread, and Scones
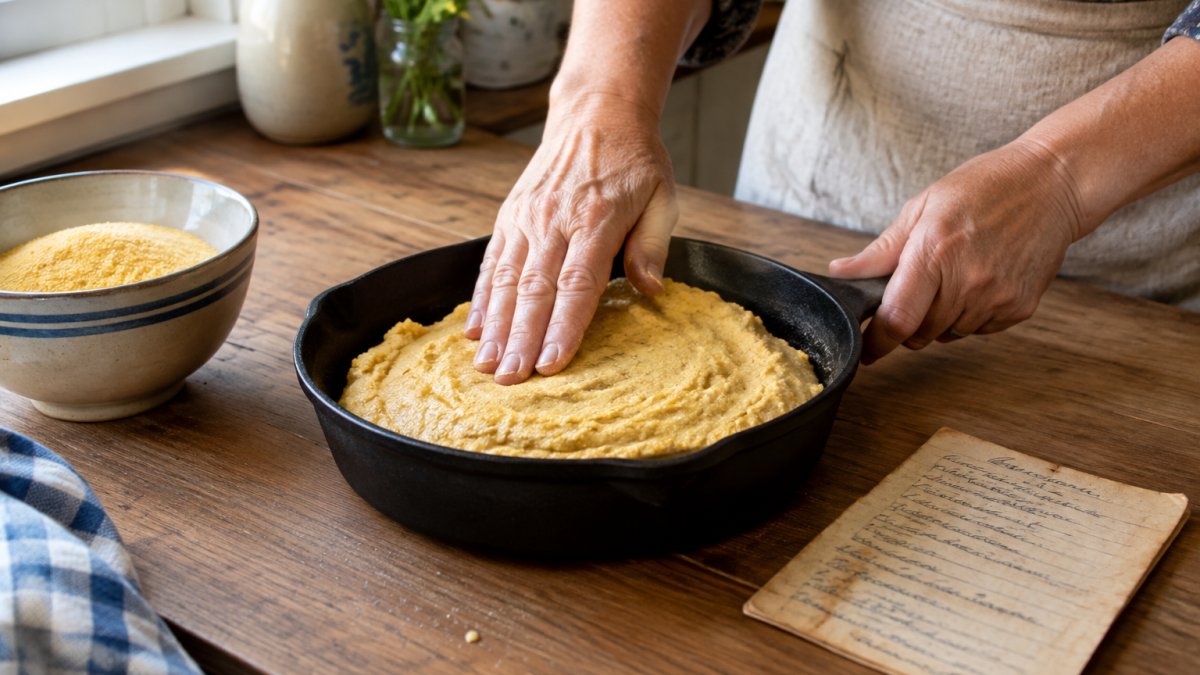
Skillet cornbread (beginner, about 35 minutes, serves 6 to 8). Old recipes call for cornmeal, buttermilk, an egg, salt, and a little fat.
Spoon bread (beginner, about 50 minutes, serves 6). Cornbread's softer cousin: more liquid and more eggs, baked until it sets like a pudding and served with a spoon.
Watch out: old recipes often say "a quick oven" without a number. For these three, 425°F is the ceiling, hotter burns the bottoms before the centers set.
Stews, Preserves, and Fruit Water
Beef and root vegetable stew (beginner, about 2 1/2 hours, serves 6). Old stews were built on cheap cuts and long cooking; the method matters more than the exact ingredients. A reliable modern version: 2 pounds chuck, cut into 1 1/2-inch cubes; 2 onions; 3 carrots; 2 potatoes; 1 turnip; 2 tablespoons fat; salt and pepper; and enough water or stock to cover. Brown the beef in batches, soften the onions, add everything back with liquid, and simmer covered for 2 hours, then uncovered for 30 minutes to thicken.
Strawberry preserves, old style (intermediate, about 1 hour active, makes about 4 half-pint jars). Preserves were how households stored fruit for winter; strawberry preserves used fruit and sugar cooked down until thick. A tested modern batch: 2 pounds strawberries, 3 cups sugar, and 2 tablespoons lemon juice. Macerate the fruit with the sugar for an hour, then cook at a hard boil, stirring, until the mixture reaches 220°F on a thermometer or sheets from a cold spoon. Process the jars in a boiling water bath for 10 minutes.
Fruit water (beginner, 10 minutes active plus overnight, makes about 2 quarts). A lighter drink made by steeping fruit in water, sometimes with a little sugar or honey. Use 2 cups sliced fruit, 2 quarts cold water, and 2 to 4 tablespoons sugar or honey to taste. Refrigerate overnight, strain, and drink within three days.
These pantry recipes teach you the preservation skills that kept kitchens running. They also taste good, which helps.
Watch out: an 1800s preserve recipe may tell you to seal jars with wax or a cloth. Use modern two-piece lids and a tested boiling-water time instead, the old seal is not a safe barrier by current standards.
Essential Tools for Historical Cooking
You need less than you'd think. A heavy pot, a cast iron skillet, a wooden spoon, and a kitchen scale cover most of the recipes in this guide.
The scale is the one tool most people skip. Old recipes measure by volume, and volume is unreliable, a cup of flour can vary a lot depending on how you scoop it.
Here's a starter kit that handles nearly everything:
- Cast iron skillet: for cornbread, scones, and anything that needs steady heat.
- Heavy-bottomed pot: for stews and preserves. Thin pots scorch.
- Kitchen scale: for turning old volume amounts into reliable weights.
Skip the specialty gear. You don't need a brick oven or a butter churn to cook historical recipes well.
Adapting Vintage Recipes for Modern Cooking
Adapting a vintage recipe means translating old measurements, heat sources, and ingredients into modern equivalents without losing the dish's character. The USDA's food and nutrition guidance is a useful reference for checking ingredient facts while you swap. Most guides stop at "use modern measurements." This section shows the actual conversions and the reasoning, so you can adapt a recipe nobody has tested yet.
Converting Old Measurements
Start with the measurements. Old recipes use teacups, gills, and "a handful." A teacup is roughly a modern cup, but not exactly. A gill is about half a cup. Here are the conversions we use most:
| Old Measure | Modern Equivalent | Notes |
|---|---|---|
| 1 teacup | about 1 cup (8 fl oz) | Slightly smaller in some sources; weigh the flour |
| 1 gill | 1/2 cup (4 fl oz) | Standard for spirits and cream |
| 1 wineglass | about 1/4 cup | Used for liquids in sauces |
| 1 tumbler | about 1 cup | Often for water or milk |
| Butter the size of an egg | about 2 tablespoons | Weigh 1 oz to be safe |
| A handful | about 1/2 cup | Depends on the ingredient; treat as a starting point |
| A pinch | about 1/16 teaspoon | For salt and spice |
When in doubt, weigh the finished dough or batter and adjust until it looks right. A cup of flour can weigh anywhere from 4 to 5 1/2 ounces depending on how you scoop it, which is why a scale beats any volume conversion.
Translating Oven Language
Next, deal with heat. Old recipes say "a moderate oven" or "until done"; modern ovens need a number.
For open-fire and wood-stove directions, use a heavy pan over medium heat, moved to a 350°F oven to finish. "Until done" becomes a doneness test: a skewer comes out clean for cakes, meat pulls from the bone for stews, and preserves sheet from a cold spoon.
A Worked Example
Take a typical 1800s line: "One teacup of sour milk, a gill of molasses, butter the size of an egg, flour enough to make a soft dough, bake in a quick oven." The translation: 1 cup buttermilk, 1/2 cup molasses, 2 tablespoons butter, about 2 1/2 cups flour (start with 2 cups and add until the dough is soft but not sticky), and a 425°F oven for 15 to 20 minutes. Convert, then test, then adjust by feel.
Watch out: doubling a vintage recipe does not always work. Old leavening amounts were inconsistent, so scale the flour and liquid but test the leavening at the original ratio first.
Substitutions and Sourcing Traditional Ingredients
Some old ingredients are hard to find. Others no longer exist in the same form. Here's how we handle the common ones:
| Old Ingredient | Modern Swap | Notes |
|---|---|---|
| Buttermilk | Milk plus lemon juice | Let it sit 10 minutes before use |
| Lard | Butter or neutral oil | Butter adds flavor; oil keeps it light |
| Pearl ash | Baking soda | Use a small amount and test first |
| Coarse cornmeal | Stone-ground cornmeal | Closer texture to the original |
| Fresh yeast cake | Active dry yeast | Follow the packet's rise times |
| Sour milk | Buttermilk or yogurt thinned with milk | Same tang, easier to find |
| Rose water | Vanilla or a mix of vanilla and a drop of almond extract | Rose water is stronger; start small |
Sourcing matters too. Stone-ground cornmeal and good butter make a bigger difference than any fancy tool. Buy the best versions of your cheap ingredients and the dish improves on its own. If a swap changes texture more than flavor, oil for butter, for example, expect a slightly lighter crumb and adjust the next batch.
Food Safety When Recreating Old Preservation Methods
Old preservation methods were built for a world without refrigeration, and some of them are risky today. The National Center for Home Food Preservation publishes tested, up-to-date canning guidance, and we recommend following it over any 1800s instruction.
Here's the rule we follow: use old recipes for flavor and method, but use modern safety standards for storage. A few specifics:
- Water-bath canning is only safe for high-acid foods like fruit preserves and pickles.
- Low-acid foods like stews and vegetables need a pressure canner, not a boiling pot.
- Old recipes that call for sealing jars with wax should be updated to modern lids.
Watch out: old recipes sometimes call for "processing until done" with no time given. Never guess on a low-acid recipe. Use a tested modern time and temperature instead.
Pick Your First Historical Recipe and Cook It This Weekend
Choose one recipe, buy the ingredients, and cook it. Cornbread is the safest first pick; a simple beef and root vegetable stew is the best second one.
DonOmite LLC is the author of Olde Tyme Recipe cookbooks for home cooks who want to cook the old way without the guesswork.
Visit DonOmite LLC's website for current details on its cookbooks and to find out what is available.
Frequently Asked Questions
Are there simple historical recipes that use common pantry staples?
Yes. Cornbread, spoon bread, pancakes, buttermilk biscuits, and bean stews rely on flour, cornmeal, buttermilk, beans, salt, and fats that most kitchens already stock. These historical recipes were built around scarce ingredients, so they rarely call for anything exotic. Start with a cornbread or a bean stew, then branch into preserves and beverages once you are comfortable with the basic cooking methods.
How do you adapt historical recipes for modern kitchen appliances?
Older recipes assume open hearths and wood-fired ovens, so temperatures were described as moderate or slow rather than in degrees. Set your oven to 350°F to 375°F for most baked goods and use the lower rack for anything meant to cook slowly. A cast iron skillet on a stovetop stands in for a hearth. Convert vague measurements like a teacup or a handful to standard cups and tablespoons, then adjust as you taste.
How can I ensure historical recipes are safe to eat today?
Treat old preservation methods with caution. Recipes for water-bath canned preserves, cured meats, and fermented goods predate modern food safety standards. Use current USDA canning guidance for preserves and fruit water, keep cured and corned beef refrigerated, and cook stews and puddings to a safe internal temperature. If a historical recipe calls for leaving meat or dairy unrefrigerated for hours, skip that step and refrigerate instead.
What was a typical meal in 1776, and can I still make it?
A typical meal in the late 18th century centered on bread, stewed or roasted meat, beans, and seasonal vegetables, with preserves and puddings for dessert. Most of it is still makeable at home. Cornbread, spoon bread, bean stew, and fruit preserves all trace back to that era. Use modern measurements and equipment, and you can recreate a colonial table without a hearth or a churn.
